A flat tire can be a frustrating and inconvenient experience, but with a bit of knowledge and preparedness, you can easily manage the situation and get back on the road. In this comprehensive guide, we’ll walk you through the essential steps to take if you get a flat tire and provide a step-by-step tutorial on how to change a tire.
What to Do When You Get a Flat Tire
- Stay Calm: The first step is to remain calm and find a safe place to pull over. Make sure you are away from traffic, on level ground, and turn on your hazard lights to alert other drivers.
- Assess the Damage: After stopping your vehicle, inspect the flat tire to determine the extent of the damage. Look for punctures, cuts, or other visible issues. If the tire is severely damaged or shredded, you may need to call for a tow.
- Secure Your Vehicle: To prevent your vehicle from rolling, engage the parking brake and place wheel chocks or heavy objects (e.g., large stones or bricks) in front of and behind the tire opposite the flat one.
- Retrieve Your Tools: Locate your spare tire, jack, and lug wrench. These tools are typically found in the trunk or under the floor mat in the cargo area. Refer to your vehicle’s owner’s manual for exact locations.
Changing a Flat Tire – Step by Step
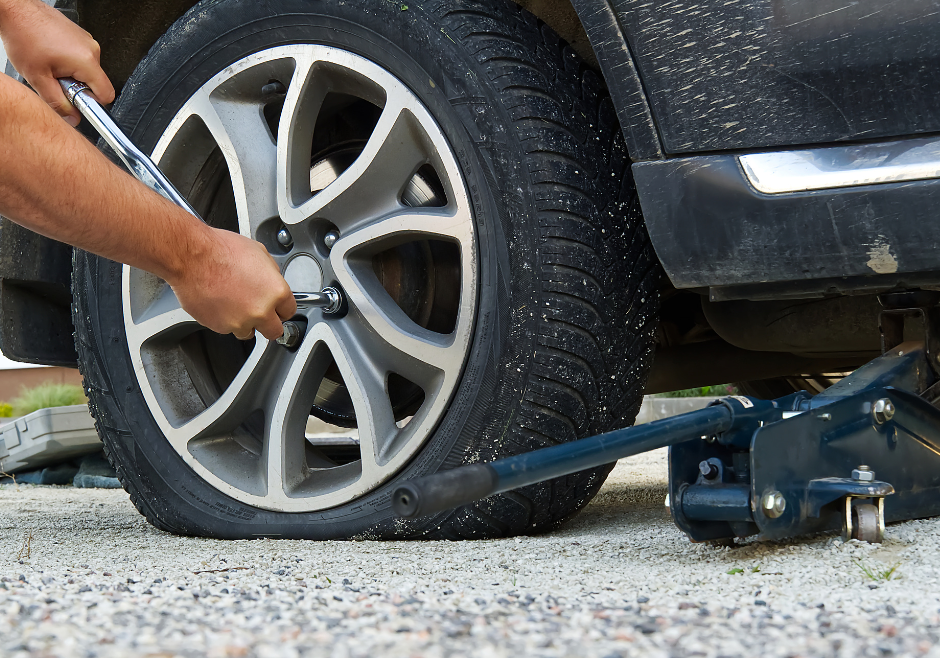
- Loosen the Lug Nuts: Before you jack up the vehicle, use the lug wrench to slightly loosen (but do not remove) the lug nuts on the flat tire. This is easier to do while the vehicle is on the ground.
- Position the Jack: Find the jacking points indicated in your owner’s manual, usually near the damaged tire. Place the jack in the correct position, ensuring it contacts the vehicle’s frame.
- Lift the Vehicle: Use the jack’s handle to pump it up, raising the vehicle off the ground. Make sure the vehicle is stable before fully removing the flat tire.
- Remove the Flat Tire: Once the vehicle is safely elevated, use the lug wrench to fully remove the loosened lug nuts from the flat tire. Gently pull the tire toward you to take it off the wheelbase.
- Install the Spare Tire: Position the spare tire onto the wheelbase, lining up the holes with the lug bolts. Push the tire onto the bolts until it is flush against the wheelbase.
- Hand-Tighten the Lug Nuts: Start threading the lug nuts onto the lug bolts by hand. This ensures that they are properly aligned before using the lug wrench.
- Lower the Vehicle: Carefully lower the vehicle using the jack. Once it’s safely back on the ground, use the lug wrench to tighten the lug nuts in a crisscross pattern (e.g., tighten the first nut, then the one opposite to it, and so on).
- Double-Check Tightness: After all the lug nuts are hand-tightened, use the lug wrench to firmly secure them. Be sure not to overtighten, as this can damage the studs.
- Lower the Jack: Once the lug nuts are tightened, fully lower the vehicle to the ground using the jack. Make sure it’s lowered all the way before removing the jack from underneath the vehicle.
- Final Lug Nut Check: Give the lug nuts one last check to ensure they are secure.
- Store the Flat Tire: Place the flat tire, the lug wrench, and the jack back in your vehicle. Be sure not to leave any tools or the damaged tire behind.
What If You Don’t Have a Spare Tire?
In some cases, your vehicle may not be equipped with a spare tire, as many modern cars come with tire inflation kits instead. If this is the case, follow these steps:
- Use the Inflation Kit: Locate your tire inflation kit, typically found near the spare tire’s location.
- Read the Instructions: Carefully read the instructions provided with the kit to understand how to use it.
- Inflate the Tire: Connect the kit to the flat tire and follow the instructions to inflate it. These kits often include a sealant that can temporarily repair small punctures.
- Visit a Repair Shop: After using the inflation kit, you should head to a tire repair shop as soon as possible. They can assess the tire’s condition and make any necessary repairs or replacements.
Safety Tips
- Always follow your vehicle’s owner’s manual for specific instructions, as different makes and models may have slight variations in the process.
- Ensure your spare tire is properly inflated and in good condition. It’s a good idea to check it periodically.
- Consider having a reflective vest or roadside flares in your emergency kit to make your vehicle more visible to other drivers, especially when changing a tire at night or in adverse weather conditions.
- If you’re uncomfortable or unable to change a flat tire yourself, call for roadside assistance or a tow service. Safety should be your top priority.
Changing a flat tire is a skill every driver should have in their toolkit. With this step-by-step guide and a little practice, you’ll be better prepared to handle the unexpected on the road.